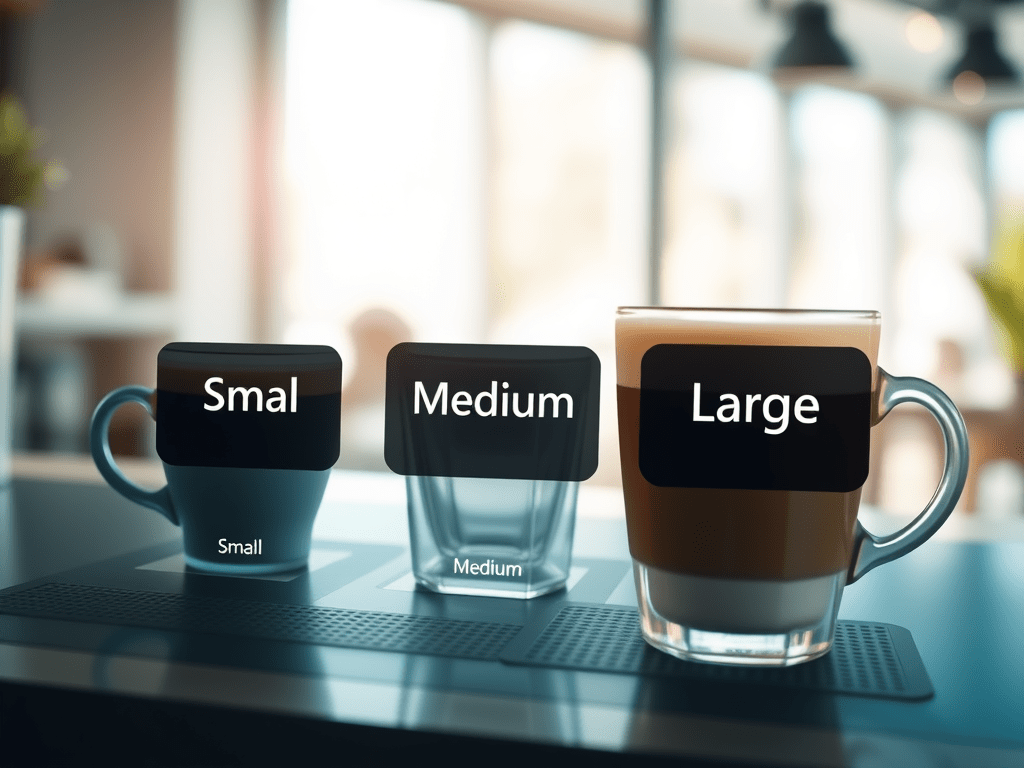
When designing a bot, it’s essential to provide users with multiple options, particularly in situations where the responses are limited to a predefined set of values. For example, when creating a coffee-ordering bot and aiming to collect information about the “Coffee Size,” offering predefined options like “Small,” “Medium,” or “Large” can greatly enhance the user experience and streamline the interaction. This approach not only simplifies the process but also ensures more accurate and efficient data collection.
In Nuance mix such components are called Interactive elements. Please note Interactive elements are available only for limited channels.
Okay, lets create the Interactive elements in the Nuance Mix, for this example we assume that you have basic understanding around the Nuance Mix, if not you can refer my blog here Nuance Mix.
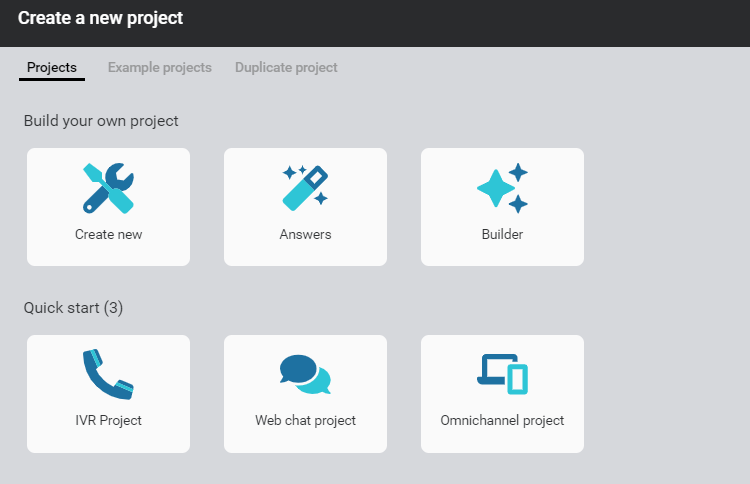
- Login to the Nuance Mix Project and create a new Project.
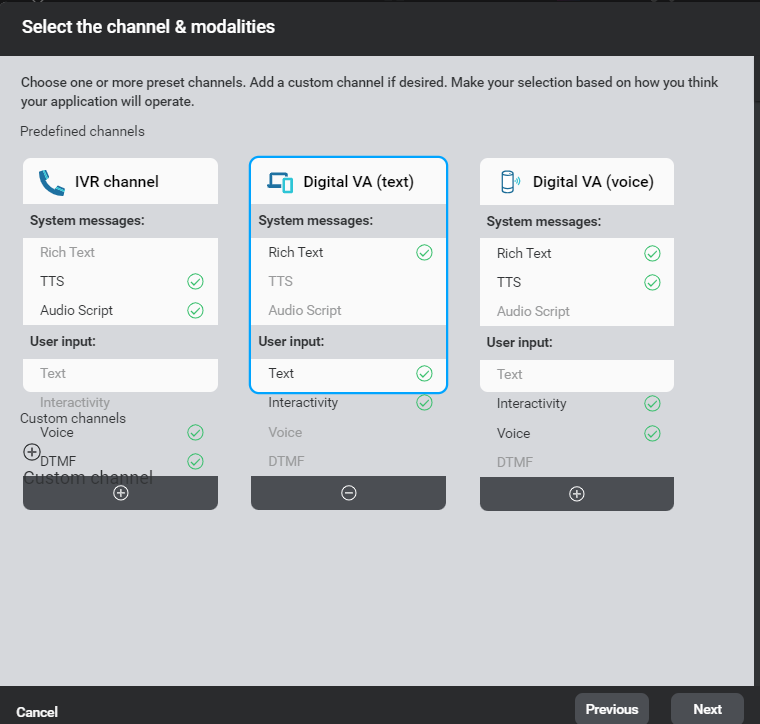
2. Select Digital VA(text) from the channel.
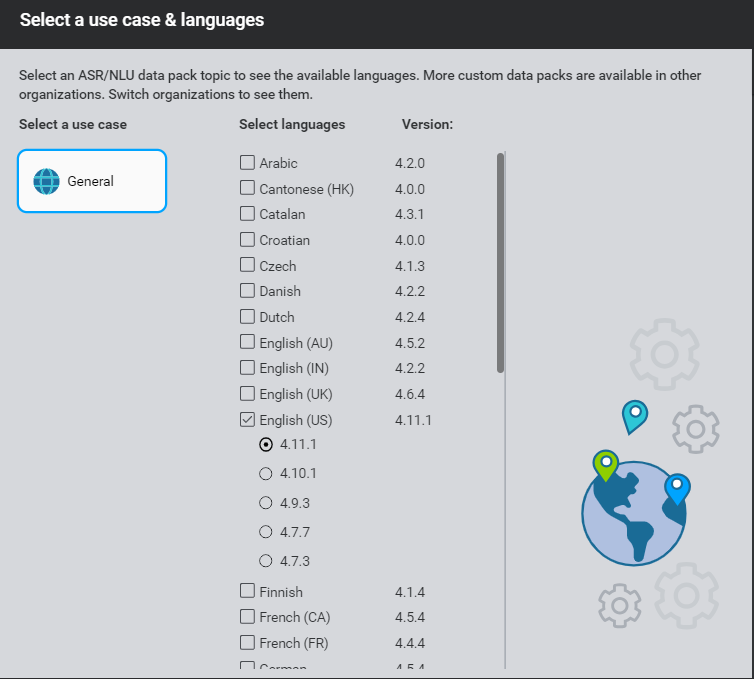
3. select language applicable.
4. Provide the Project Name and click on create.
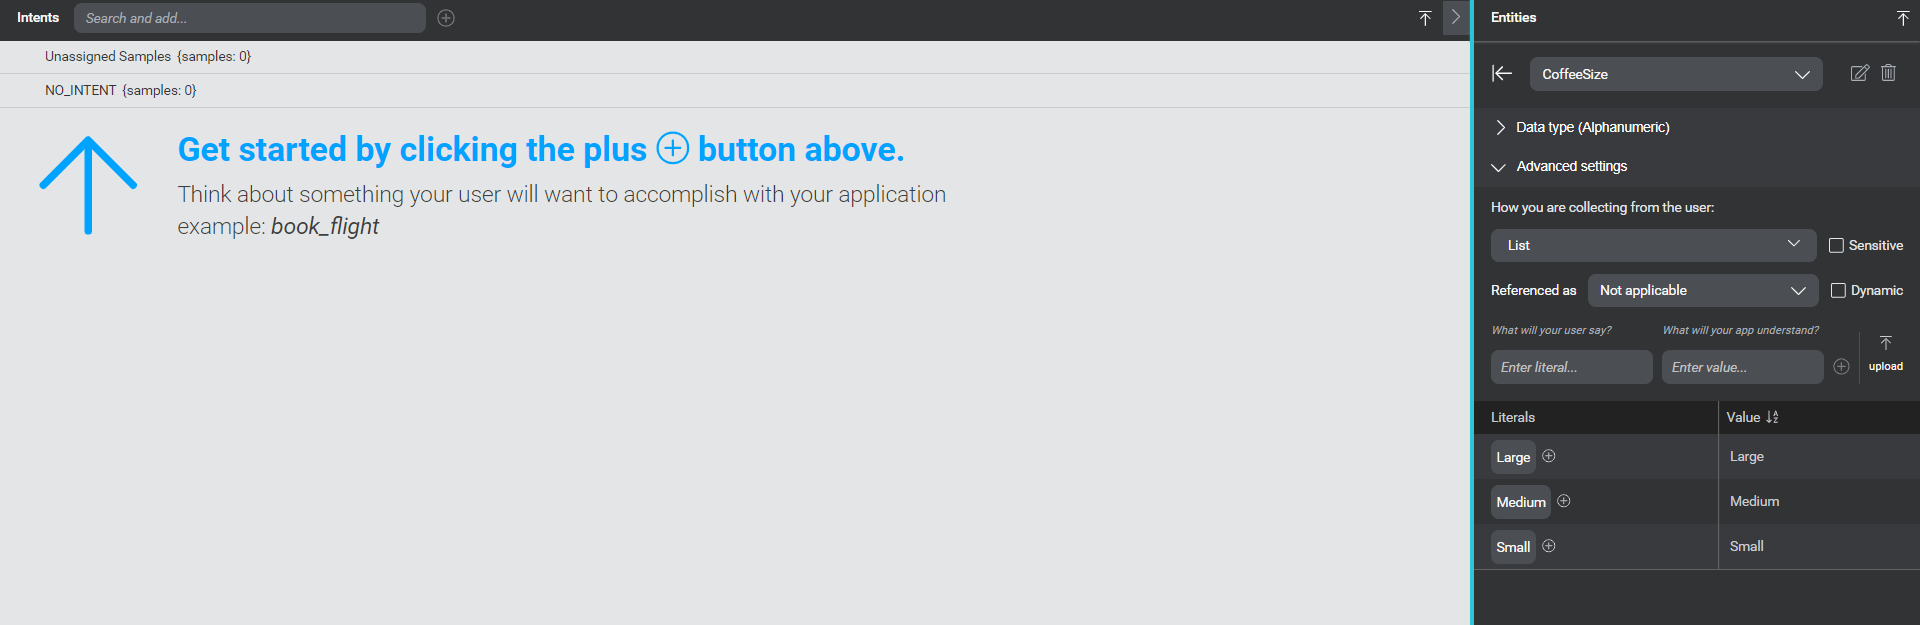
5. For this example, let’s start by creating a new entity called ‘coffee size’ with the data type set to ‘Alphanumeric.’ We’ll assign the values ‘Small,’ ‘Medium,’ and ‘Large’ to this entity. To begin, simply navigate to the NLU interface and select ‘Entities,’ as shown below.
So, we have defined the entity, lets use the same entity in the conversation dialog.
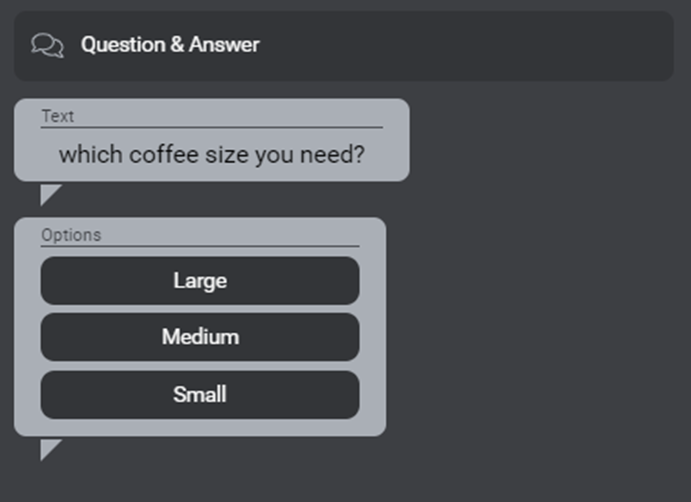
6. Switch to the dialog screen and add a question and answer component on
the dialog canvas.
7. Type the message as “which coffee size you need”.
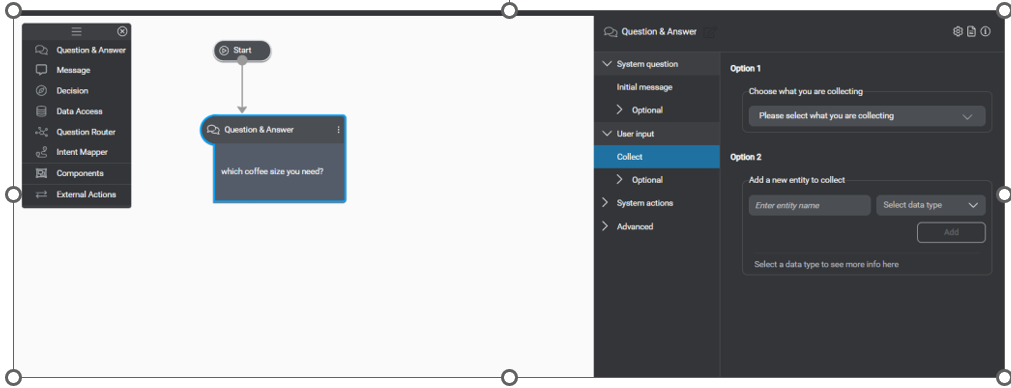
8. To collect answers within the entity defined in step 5, click on ‘Collect the entity,’ as indicated below.

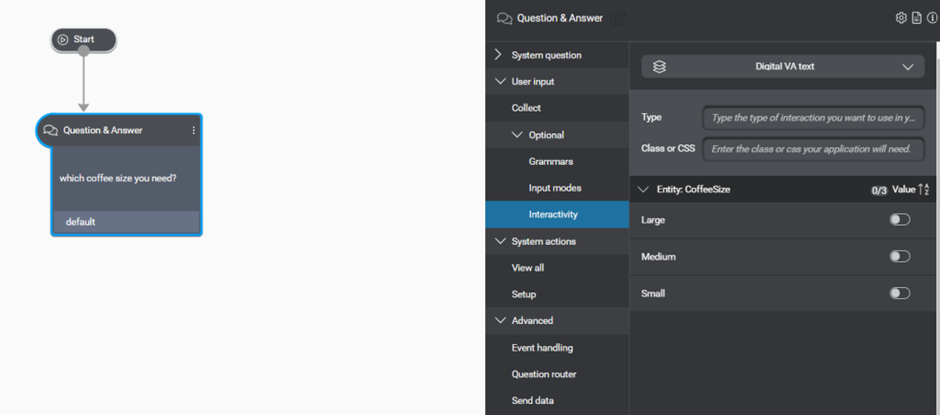
9. Under optional, select the Interactivity, you will get a screen shown below.
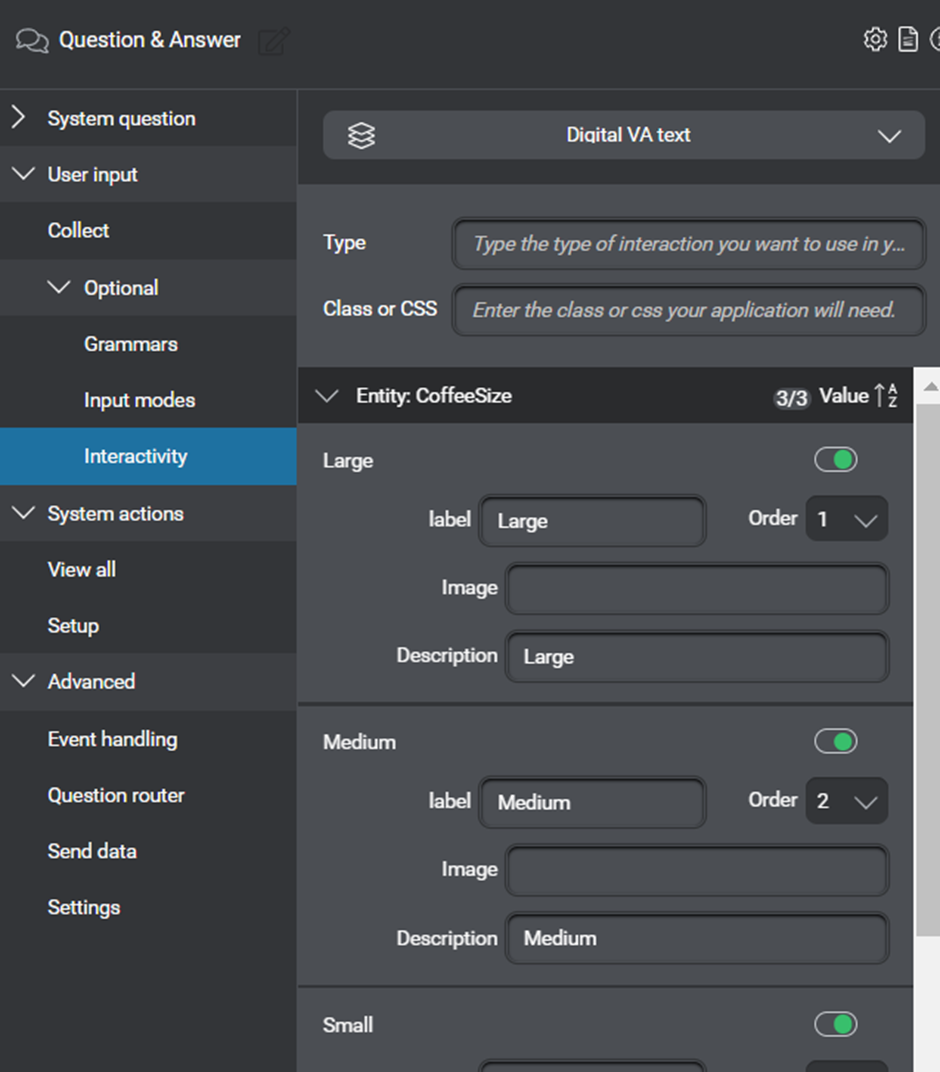
10. Now, toggle each option to enable it, and define the corresponding label for each option, as demonstrated below.
Optional : Optionally, you can build other components for the dialog flow. However, for our example, let’s test the visibility of the buttons for response. Click on ‘Try.’
As shown in the image below, users can directly select the options from the presented menu instead of typing them.
You can define action for each of these selected options.
By incorporating “Interactive controls” within your dialog flow, you can enhance the interactivity and user-friendliness of your bot.


Leave a comment