
In this blog post, we explore the implementation and testing of an omnichannel voice step in customer service. We guide readers through the necessary steps to set up and test the calling feature in D365 CE.
Configure Azure Communication Services voice channel – Step by Step Guide
In recent years, we have seen an increase in the demand for ACS which is also called Microsoft first-party voice solutions . In this article I will show step by step guide for setting up ACS as voice and also discuss how it is different from other voice provider.
Before we delve into the implementation, let’s familiarize ourselves with a few key concepts surrounding ACS and its limitations.
There are several methodologies to implement voice functionality in a contact center. Each approach offers unique advantages and can be tailored to meet specific business needs. Dynamics 365 Customer Service allows it to seamlessly connect with various telephony providers. Telephony Integration insures that customer calls are routed to appropriate agents and responded accordingly.
Azure communication services
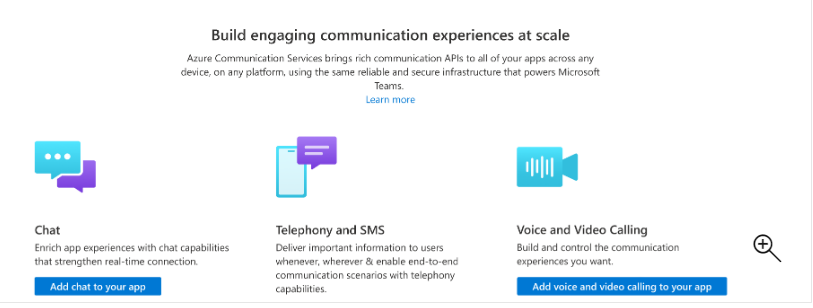
As per official Microsoft definition – Azure Communication Services offers multichannel communication APIs for adding voice, video, chat, text messaging/SMS, email, and more to all your applications
In numerous regions worldwide, Microsoft serves as a Telephony provider. This service is implemented via Azure Communication Services, which employs the same underlying technology framework that powers ‘Microsoft Teams’ calls.
You can follow below to set up Voice channel.
Before we go into depth, lets understand why should customer should choose ACS as voice other telephonic provider, below are the clean wins ACS implemented as voice.
- Native Integration with customer service omnichannel (Low code/No Code set up)
- Native calling experience
- Hosted on Microsoft Azure framework
- Secure and trusted by millions of customer (as the underlying voice Tech is same which enables voice on Microsoft Teams)
- Real time AI support (Real time customer sentiments, translations, transcripts, call Insights and many more)
Prerequisites: To enable omni-channel voice, you must have Customer Service Enterprise license Dynamics 365 Customer Engagement along with either one of this Dynamics 365 Customer Service Voice Channel Add-in or Dynamics 365 Customer Service Digital Messaging and Voice Add-in.
To Plan in your tenant, you can refer to the system requirements and licencing.
Before you begin adding voice capabilities, it’s necessary to provision the Customer Service Omnichannel app. You can accomplish this by navigating to the ‘Resources’ section in the Power Platform Admin Centre. From there, select ‘Omnichannel for Customer Service’. Then, click on the three-dot menu and select ‘Manage.
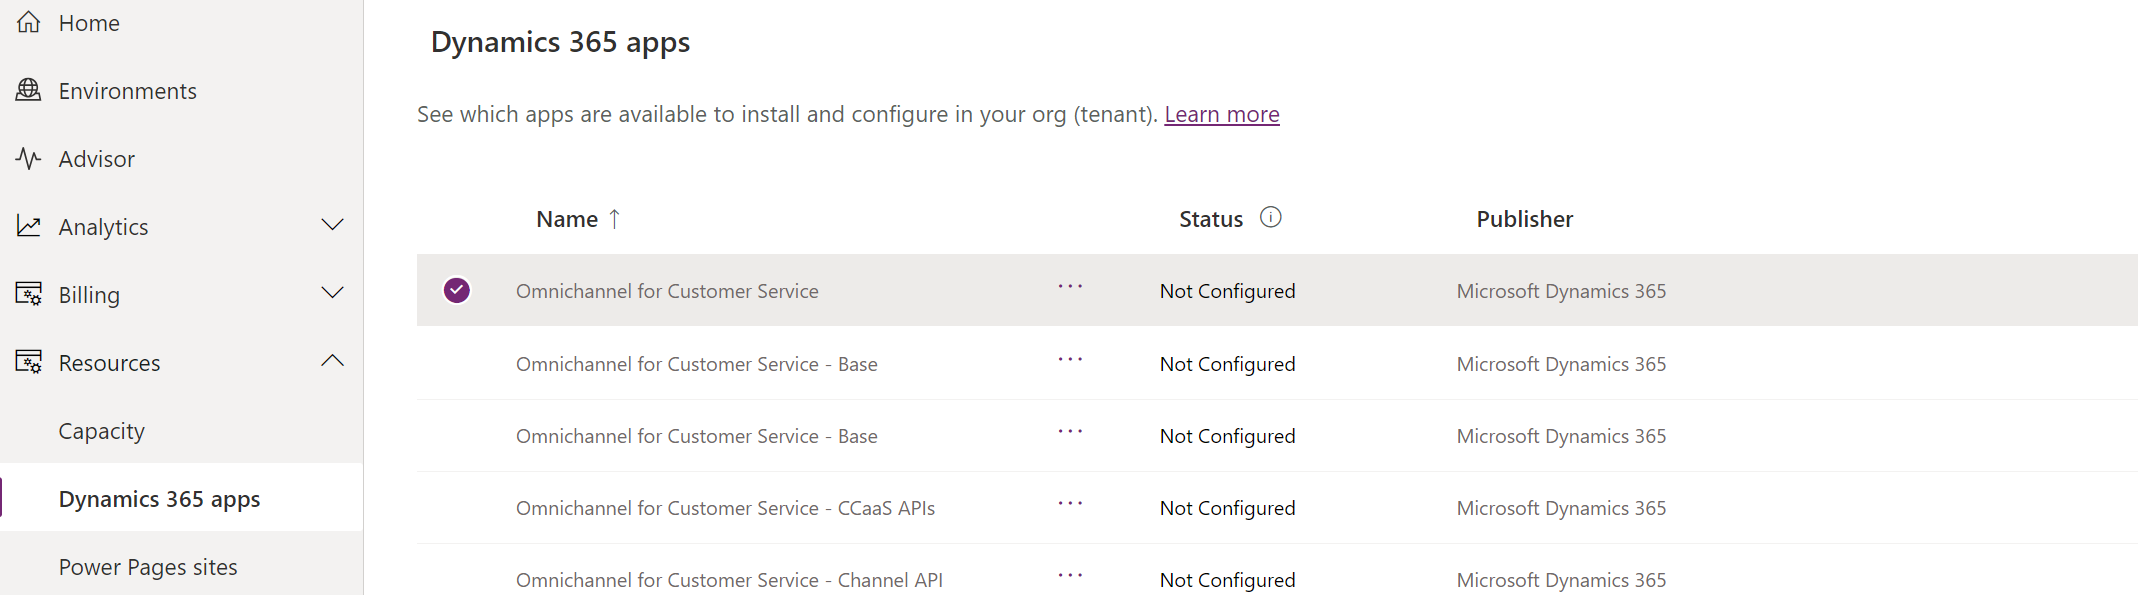
Please note: This might take few hours to enable the configurations.
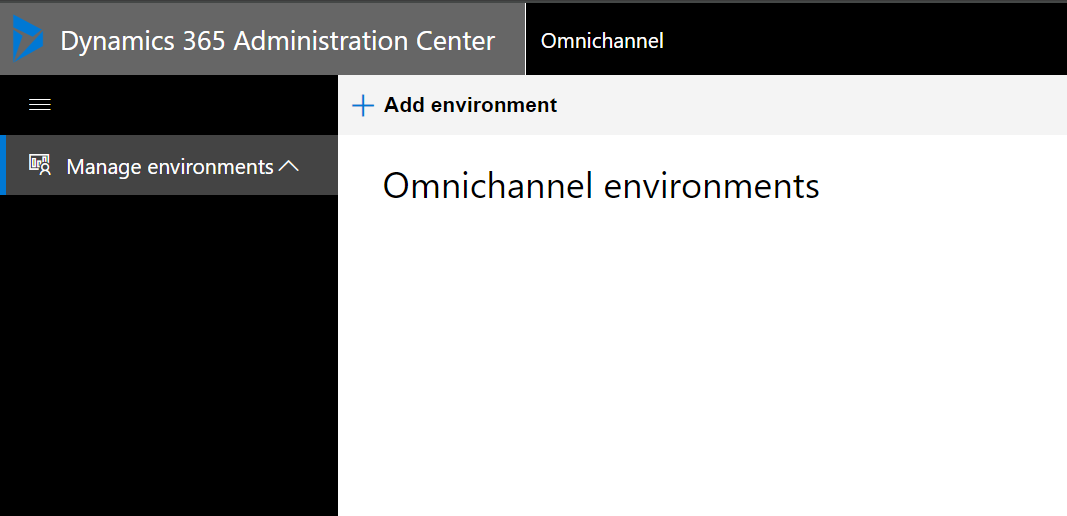
You will be redirected to the Omnichannel environments as show below. Here you can add your specific environment.
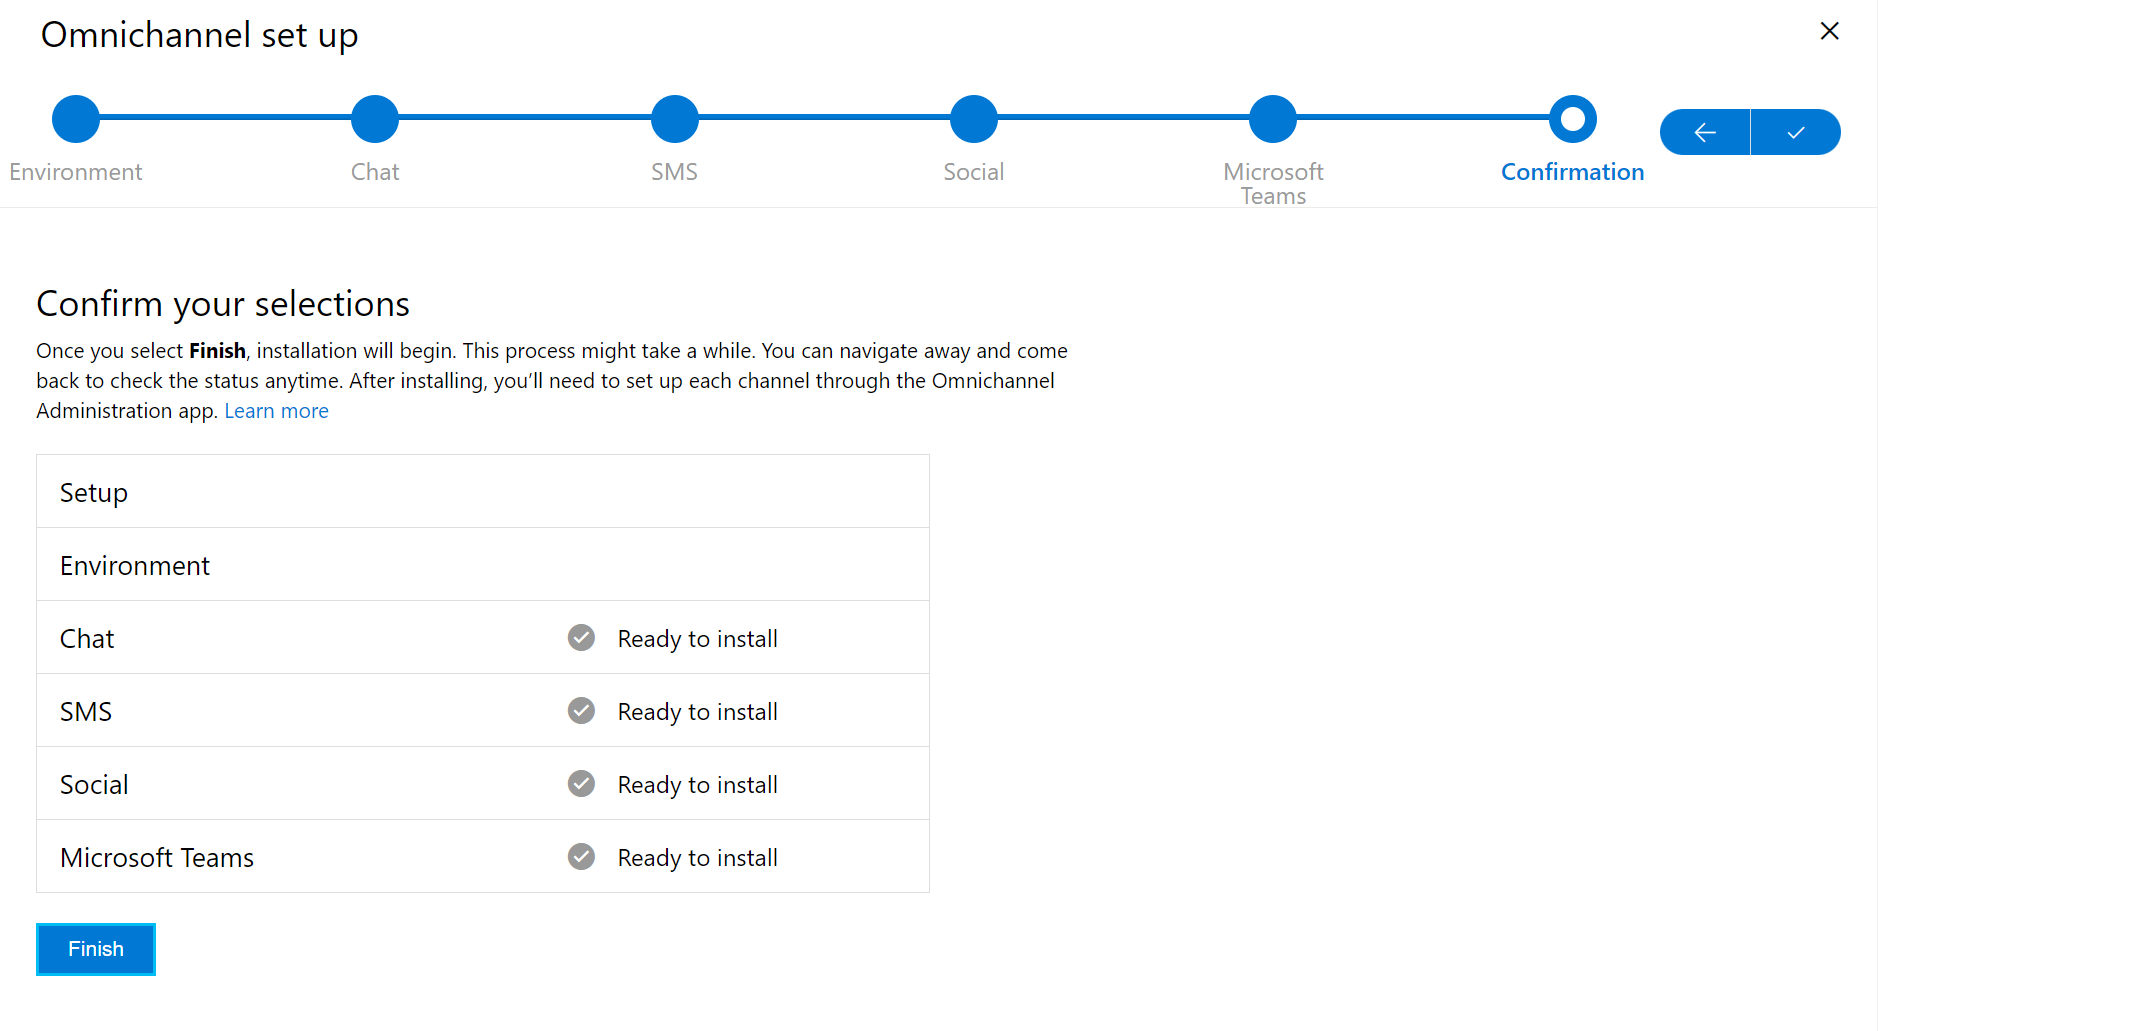
You can complete the set up as applicable for your requirements as shown below.
Once Omnichannel App is provisioned, you can follow below steps to configure voice.
Step 1. Azure communication Service Resource.
First You need to create ACS resource via yours subscription from portal.azure.com , you can follow steps here
Step 2: Obtain a Phone Number
Once you’ve set up your Azure Communication Services (ACS) resource, you’ll have the ability to acquire a phone number. However, it’s important to note that ACS does not function as a telephony provider in all regions. Therefore, when planning or setting up ACS, it’s crucial to check the most recent availability. Microsoft is continually expanding this service to new regions. After setting up your ACS resource, you can follow the steps to obtain either a local or toll-free number here.
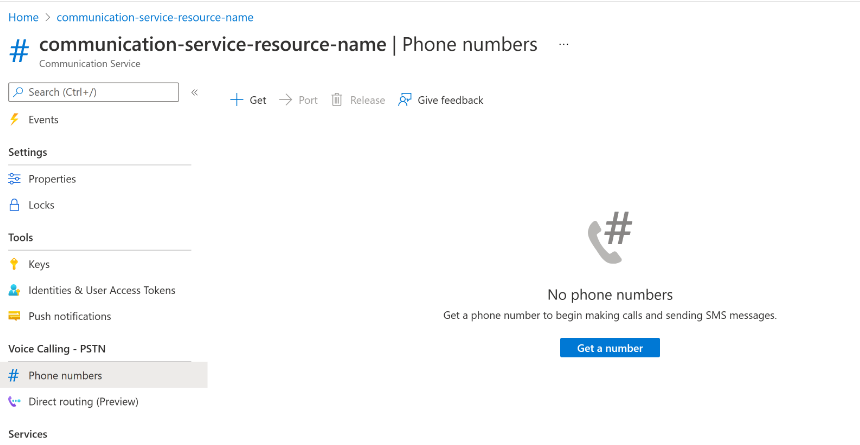
When acquiring a number for your contact centre, you have the opportunity to specify the features you require. These may include calling capabilities, SMS services (either incoming, outgoing, or both), among other properties. This allows you to tailor the service to your specific needs.
Set Up Voice Channel
Great, we now have all the necessary components to configure our customer service omnichannel voice capability via Azure Communication Services (ACS).
To proceed, you’ll need to log in to the Customer Service Admin Centre. It’s important to note that certain additional security roles related to omnichannel are required to perform this activity. If any roles are missing while you’re configuring the settings, you will be prompted accordingly.
Once you’ve opened the Customer Service Admin App, click on Channels and then click on Manage Voice as shown below.
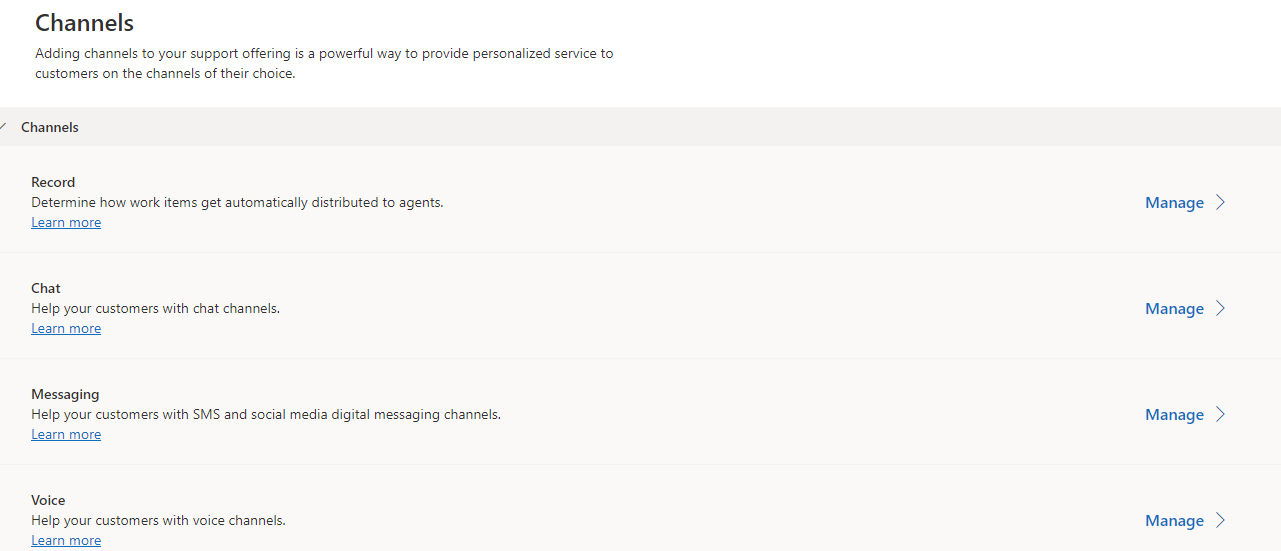
When you click on ‘Manage’, you’ll need to Add Channel here
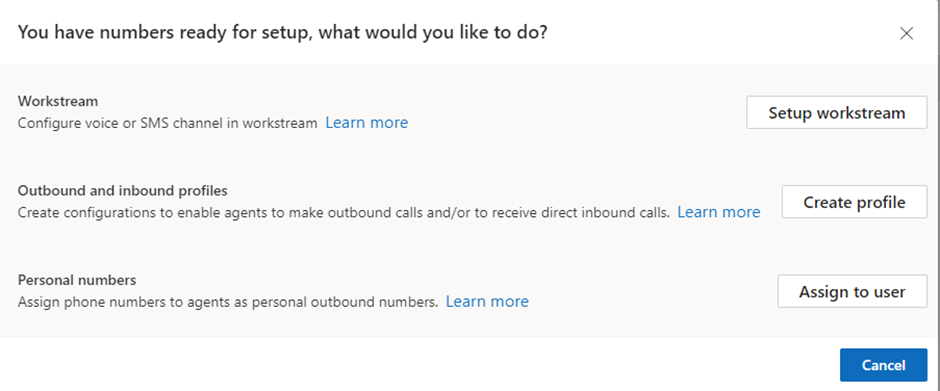
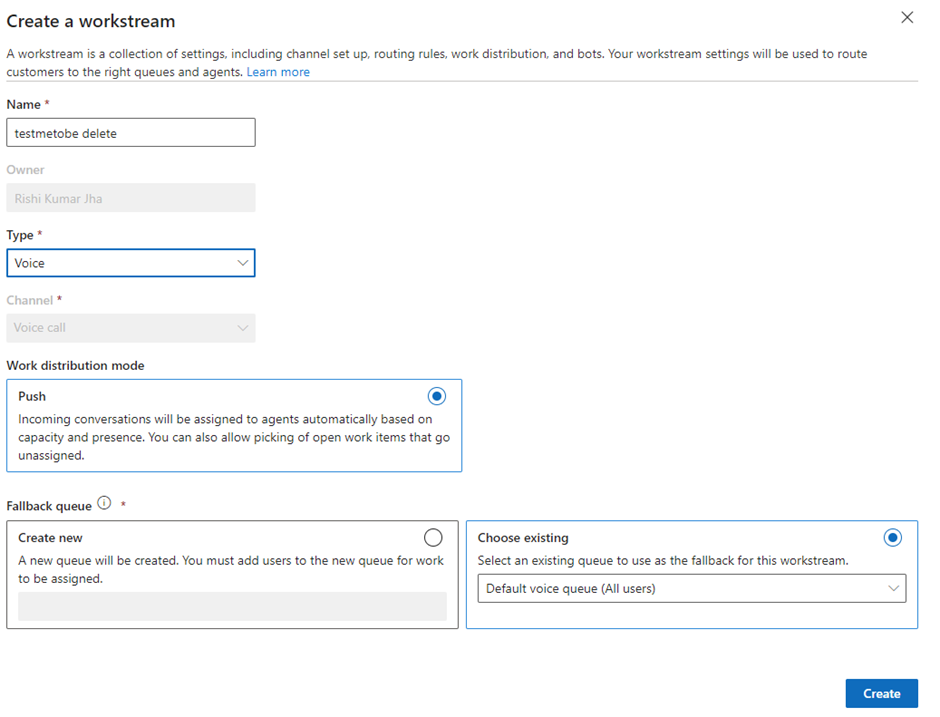
Workstream
A workstream is a comprehensive collection of settings that includes channel setup, routing rules, work distribution, and hours of operation. These settings are utilized to efficiently route customers to the appropriate queues and agents
Create Profiles
You can create inbound and outbound profiles. From customer service admin centre app you can create profiles via Productivity menu options.


You can follow the steeps to create profile here.
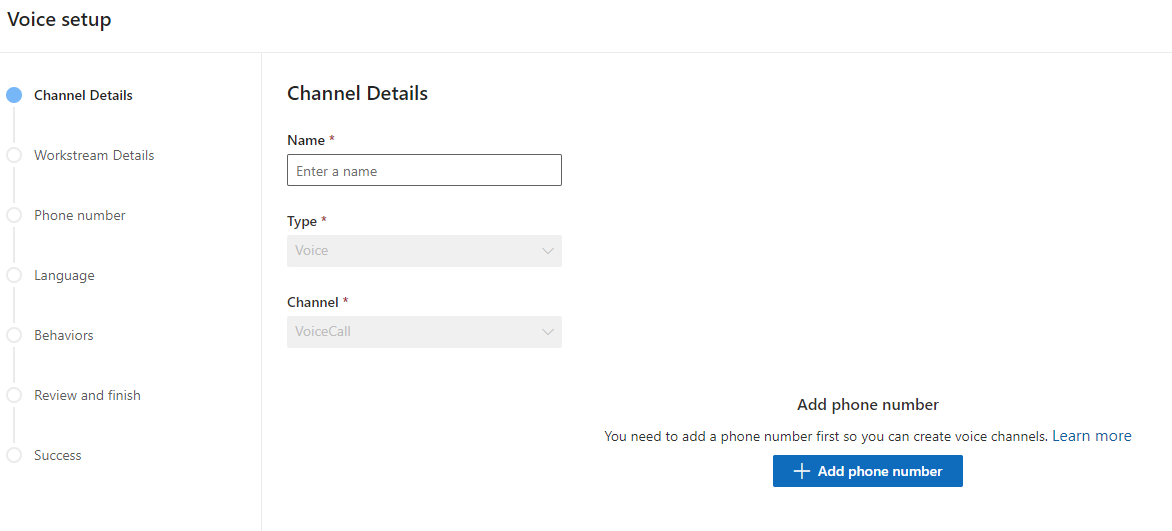
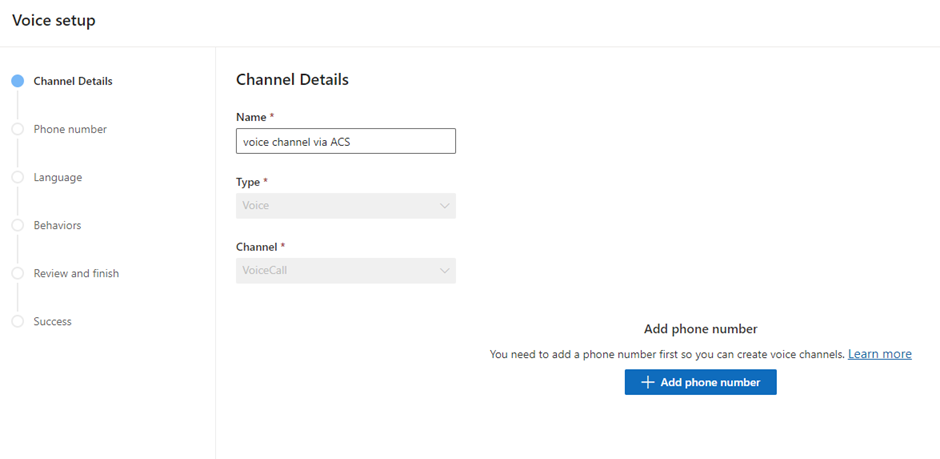
Create Voice Channel
After creating your workstream, you’re now ready to set up your channel

You can specify the details for your channel, such as the language, behaviours, and phone numbers, as outlined below
Behaviours-
You have the ability to define the behaviours during the channel setup process, as outlined below
- Customer wait time
- Notify position in Queue
- Notify Average wait tome
- Channel operating hours
- Enable or disable Transcript and recordings
You can associate your workstream with the voice channel created.
After completing the aforementioned steps, you will be prepared to test the calling feature. It’s advisable to create a contact initially, inputting the mobile number that you intend to use for testing. This approach will enhance your experience by matching the contact and automatically loading the contact form as soon as the customer service agent answers the call within the workspace..
Test – Call Feature:
To test this feature, you can Navigate to “Customer Service Workspace App”, the logged in users must have roles like Omnichannel Agent or higher. Dial the ACS provisioned telephone number, a popup for incoming phone call will be shown in customer service workspace app, and agent can pick up the call, call transcripts, recordings and other behaviours will be shown as per configurations.

Service Limits:
You can read Azure communication services , service limit here
Setting up ACS as a voice channel involves several steps, from creating an ACS resource to testing the call feature. Each step is crucial and allows for customization to meet specific business needs. The guide provides a comprehensive overview of the process, making it easier for users to implement ACS as a voice channel.


Leave a comment